
The DIY Guide to Installing an Artificial Green Wall
Quick Answer
Installing an artificial green wall involves securing a sturdy backing panel, attaching the greenery tiles in a tight, interlocking pattern, and anchoring the completed sections to the wall using screws or mounting hardware. The key is to create a seamless, natural‑looking layout while ensuring the structure is safely and securely supported.
Summary Paragraph
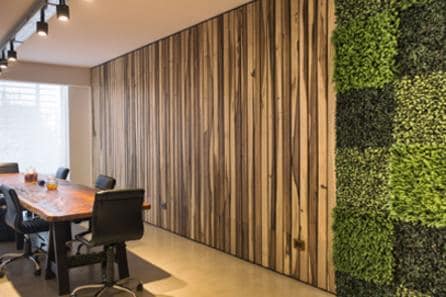
An artificial green wall can be installed by preparing a solid mounting surface, laying out your greenery tiles, and fastening each panel to the wall to create a lush, continuous design. This guide walks you through the tools you’ll need, how to plan your layout, and the best techniques for attaching panels so they look realistic and stay secure over time. Whether you’re installing a green wall indoors or outdoors, these steps help ensure a professional, long‑lasting result. It’s an ideal solution for adding biophilic design to homes, offices, restaurants, and commercial spaces.
DIY Guide to Installing Green Wall Panels
These step-by-step instructions show how easy it is to install our green wall panels. You should be able to do this yourself at home or the office.
- Gather Tools Required:
For Plaster Walls
Staple Gun
Drill & Screw Drill Head + Screws
For Walls/Fences
Cable ties
Scissors
For Brick, Concrete, or Masonry Walls
Concrete / Brick Anchor Plugs
Hammer, Drill + Drill Bit - Preparation:
Measure your space (multiply length times width to calculate the total square feet required) and order enough panels to cover the wall or fence you seek to beautify. Different panels have different dimensions.
Mark up the area where you wish to install the panels.
Ensure that the area you are installing the green wall does not obstruct any switches or important access entrances. - Installation:
For Plaster Walls
Simply staple the panels to the wall/fence or use a drill and add screws and washers.
For Walls/Fences
– Push a cable tie through the vertical garden panel and loop it back around through the head of the cable tie and pull tight.
– Cut off the excess end of the cable tie.
For Brick, Concrete, or Masonry Walls
– Drill your hole adjacent to the backing mesh.
– Place the plug into the wall whilst holding the vertical garden panel against the wall
– Hammer or insert the wall fixing whilst ensuring the head of the fixing grips the panel against the wall.
For more information, contact Pacific Silkscapes.

